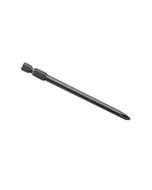
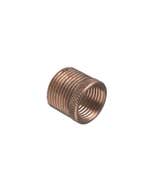
Self-Drilling Screw
Brand Name: Clipsal
Thread Size: 6 mm
Length: 50 mm
Drive Type: Phillips
Drive Size: #2
Point Type: Twin Start Needle
Head Type: Pan
Head Size: 6.85 mm Diameter
Clipsal Screw Self Drill 6 Gangx50Mm 100 Bag - 357P50
Clipsal 357P50 Tek Screws, Pan Head, Needle Point Screws, Self Drilling, Yellow Zinc Plated, 6g x 50mm, 100 Pack
0 In Stock
Need more?
This item is currently not available for backorder.
We can notify you when it's available again by subscribing to the back in stock notification. Enter your email address and click submit to automatically receive an email when we get more in.
Price
$3.87 $3.52
Choose your style, Select your Switch and Checkout
We can customise your powerpoint to a range of colours and layouts, suited to your needs.
Clipsal Screw Self Drill 6 Gangx50Mm 100 Bag - 357P50


Width 85
Height 30
Depth 145
| SKU | CLI357P50 |
|---|---|
| Supplier No | 357P50 |
| EAN / Barcode | 9311554189228 |
| Height | 30.000000 |
| Length | 145.000000 |
| Width | 85.000000 |
| Brand | Clipsal |
| Thread Size | 6 mm |
0 of 0 Reviews
A FEW FAQS
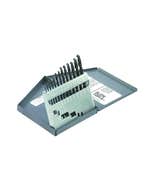
The part number for the bitsa box is 357TB. Some of the key features are: Tool boxes 12 compartment transparent box with assorted screws, screws and quantities included Includes: 357WF30 (100), 357/20 (150), 357WH12 (350), 357P30 (200), 357P20 (300), 357WH25 (100), 357PH50 (50), 357/63 (50), 357WHP32 (100), 357PH45 (100), 357/35 (100), 357/40 (100) For further information please visit www.clipsal.com/Trade/Products/ProductDetail?catno=357TB
357P20 is made of Zinc plated steel. For further information, please visit https://www.clipsal.com/Trade/Products/ProductDetail?catno=357P20
Part number is PL35150D available in White,Black,Natural Anodised & Oyster Grey and it is 2400mm long.
Issue: I don't know if my Quantum PLC is connected to the Modbus Plus network. How can I tell if the 140CPU651xx is connected to a live Modbus Plus network? Product Line: Quantum PLC Environment: EcoStruxure Control Expert Unity Pro Resolution: *** Modbus Plus Cable Disconnected*** *** Modbus Plus Cable Connected***
Issue: This document will describe how to Install a Duct System in an EcoAisle. Product line: EcoAisle Environment: All Cause: Install Resolution: Duct System Installation IMPORTANT: Install support brackets before proceeding with the remainder of this installation. Refer to “Support Bracket Installation” on page 38 for instructions on how to install the support brackets.
Issue: How to Start your Symmetra PX 250/500 UPS Product line: Symmetra PX 250/500 Environment: All Product models, all serial numbers Resolution: Begin by applying power to the UPS by Closing the Q1 Breaker (Located in System I/O Cabinet) Once the display is completely powered up and the Home screen is displayed, press the wrench icon in the lower left of the screen Then select the operation button Select System Startup Follow the on screen prompts for starting up the UPS. As each option is performed it will highlight the next step. Some options are automated and will be done for you. The following video demonstrates this procedure: